Wednesday, July 24, 2013

Chicken Enchiladas


Ha! So I thought I was going to be able to update this once a week. Seems the year has gotten away from me! Well, here is the Chicken Enchilada recipe we always use.

Tip #6: Poaching Chicken is a quick easy way of cooking chicken. You can even poach frozen chicken breasts! Just increase the poaching time by about 5 to 10 minutes and check the meat with a thermometer to be sure it's cooked. To poach chicken you need enough liquid (usually chicken broth) to cover your chicken, you can add any other spices you want. After you cover your chicken, be sure to keep the liquid from boiling too much or you'll end up with dry chicken! (see the recipe for how to poach chicken :-))
 

Chicken Enchiladas

8 soft flour tortillas
3 Cups chicken broth
1 bay leaf
2 sprigs fresh oregano (1 teas. dried)
1 onion, quartered
4 boneless skinless chicken breasts
2 Tablespoons tomato paste
1 teas. ground cumin
1 teas. Chili powder
2 to 3 Cups Enchilada Sauce
2 cups shredded Monterey Jack cheese
¼ cilantro leaves, chopped
                                 
1. Preheat oven to 275, wrap tortillas in foil and warm in oven (I always skip this part)

2. Place a medium sized skillet on high heat, add broth, bay leaf, oregano and onion. Bring to a boil. Add chicken and return to boil. Cover with lid and reduce heat to medium. Poach chicken about 10 minutes or until cooked. Remove chicken and cool, reserve ½ cup poaching liquid.

3. Shred chicken into small strips using two forks or fingers. Add ½ cup poaching liquid, tomato paste, cumin, chili powder and season with salt and pepper.

4. Remove tortillas from oven, increase heat to 350.

5. Pour about ¼ Cup Enchilada sauce on bottom of 13x9 pan. Divide chicken equally between tortillas and roll into tube. Place enchiladas seam side down in casserole. Pour remaining sauce over tubes, top with cheese.

6. Bake about 15 minutes. Sprinkle with cilantro.

 (If Frozen, remove saran wrap! Replace foil and bake about 1 hour at 350 degrees. Remove foil bake about 5 minutes with broiler on to brown cheese)

Variation: We usually put potatoes and peas in our enchiladas (no idea, ask my husband). I cut up potatoes into ½ inch squares and throw it in when the chicken is poaching (if there isn’t enough room in the pan, throw in the potatoes after the chicken is done). Then when I fill the tortillas I add the potatoes and frozen peas.

~Adapted from: http://www.foodnetwork.com/recipes/rachael-ray/chicken-enchiladas-recipe/index.html

Enchilada Sauce

¼ Cup oil
2 Tablespoons flour
2 Tablespoons Chili powder
1 15 oz can tomato sauce
1 ½ Cups water
1 teaspoon Cumin
½ teaspoon garlic powder
½ teaspoon onion powder
½ teaspoon red pepper sauce
¼ teaspoon cinnamon
Salt

1. Heat oil in small saucepan till shimmering. Add flour and chili powder. Cook, stirring constantly until browned (about 2 minutes)

2. Add the rest of the ingredients, cook about 10 minutes over medium heat, stirring frequently, until thickened.

(Feel free to adjust any ingredients to taste! If you want it spicier or bolder, increase chili powder and red pepper sauce, etc)
~adapted from: http://www.foodnetwork.com/recipes/rachael-ray/chicken-enchiladas-recipe/index.html

Tuesday, January 1, 2013

Chocolate Raspberry Torte

In honor of the new year I am going to finally post my Chocolate Raspberry Torte recipe. I am also going to attempt to get things more organized and actually update my blog once a week... (okay, maybe just every week and a half...). This new year is bringing a big change for me. I'm really hoping to be able to focus more time on my kids, my marriage and me. Hopefully I haven't bitten off more than I can chew, but I am very excited about all the new beginnings of 2013 :-)

Alright, back to food. This torte is time consuming! Everytime I make it I swear that I'll never make it again but it has become my go to fancy dessert. It's pretty and yummy and works well when you want to show off just a little bit :-)

Tip #5:
It is very easy to melt chocolate with a double boiler. All you need is a heat proof bowl (pyrex works) that fits snuggly into a sauce pan. Fill the sauce pan with 1 inch of water and bring it to a simmer (not a boil!). Place your bowl into your sauce pan (be sure the bottom of the bowl does not touch the water) and add your chocolate. The chocolate should melt quickly, just be sure to stir often and watch the heat.

Chocolate Raspberry Torte

Cake and Filling
8 ounces bittersweet chocolate, chopped fine (Ghiradelli or Callebaut Intense Dark)
12 tablespoons unsalted butter, cut into 1/2 inch pieces
2 teaspoons vanilla
1/4 teaspoon instant espresso powder
1 3/4 Cups sliced almonds, lightly toasted
1/4 cup flour
1/2 teaspoon salt
5 large eggs
3/4 Cup sugar
1/2 cup fresh raspberries, plus 16 individual berries for garnish
1/4 cup seedless raspberry jam
 
Chocolate Ganache Glaze
5 ounces bittersweet chocolate, chopped fine
1/2 cup plus 1 tablespoon heavy cream
 
For Cake
  1. Adjust oven rack to middle position and heat oven to 325 degrees.
  2. Line bottom of two 9 inch wide by 2 inch high round cake pans with parchment paper.
  3. Melt chocolate and butter in large heatproof bowl set over saucepan filled with 1 inch simmering water, stirring occasionally until smooth. Remove from heat and cool to room temperature, about 30 minutes.
  4. Stir in vanilla and espresso powder.
  5. Process 3/4 cup almonds in food processor until coarsely chopped, six to eight 1-second pulses; set aside to garnish cake. Process remaining cup almonds until very finely ground, about 45 seconds. Add flour and salt and continue to process until combined, about 15 seconds.
  6. Transfer almond flour mixture to medium bowl. Process eggs in now-empty food processor until lightened in color and almost double in volume, about 3 minutes.
  7. With processor running, slowly add sugar until thoroughly combined, about 15 seconds. Using whisk, gently fold egg mixture into chocolate mixture until some streaks of egg remain. Sprinkle half almond-flour mixture and gently whisk until just combined.
  8. Divide batter between cake pans and smooth with rubber spatula. Bake until center is firm and toothpick inserted into center comes out with few moist crumbs attached, 14 to 16 minutes.
  9. Transfer cakes to wire rack and cool completely in pan, about 30 minutes.
  10. Run paring knife around sides of cakes to loosen. Invert cakes onto cardboard rounds cut same size as diameter of cake and remove parchement paper. Using wire rack, reinvert 1 cake so top side faces up; slide back onto cardboard round.

To Assemble Torte

  1. Place 1/2 cup raspberries in medium bowl and coarsely mash with fork. Stir in raspberry jam until just combined. Spread raspberry mixture onto cake layer that is topside up.
  2. Top with second cake layer, leaving it bottom side up. Transfer assembled cake, still on cardboard round, to wire rack set in rimmed baking sheet.
For the Glaze
  1. Melt chocolate and cream in medium heatproof bowl set over saucepan filled with 1 inch simmering water, stirring occasionally until smooth. Remove from heat and gently whisk until very smooth.
  2. Pour glaze onto center of assembled cake. Use offset spatula to spread glaze evenly over top of cake, letting it flow down sides. Spread glaze along sides of cake to coat evenly.
  3. Using fine-mesh strainer, sift reserved almonds to remove any fine bits. Holding bottom of cake on cardboard round with 1 hand, gently press sifted almonds onto cake sides with other hand. Arrange raspberries around circumference. Refrigeratte cake, still on rack, until glaze is set, at least 1 hour and up to 24 hours. Transfer cake to serving platter, slice and serve.
~Cooks Illustrated #107

Saturday, September 29, 2012

Grilled Beef Satay

What is it about meat on a stick? It's so much more fun to eat and I can eat twice as much! Yum! This recipe seems somewhat time intensive. I've made it twice now and felt like it took awhile + left a huge mess in my kitchen! It is so good though that I will most likely continue to make it.

(I haven't been able to find lemon grass in muscatine, but it tastes great without it. I have found that 1 can of coconut milk is enough for the Basting sauce & the peanut sauce)

Cooking Tip #3:
If you don't have aluminum skewers, you can use Bamboo skewers. Just be sure to soak them in water for 30 minutes.

Cooking Tip #4:
Don't marinate with Ginger! Fresh ginger contains an enzyme known as zingibain that if left too long on meat, breaks down collagen on the meat's surface, producing the same mealy effect as acids and some juices. Aka: it will make your meat mushy!

Grilled Beef Satay

Basting Sauce
     3/4 cup regular or light coconut milk
     3 Tablespoons packed dark brown sugar
     3 Tablespoons fish sauce
     2 Tablespoons vegetable oil
     3 shallots, minced
     2 stalks lemon grass, trimmed to bottom 6 inches & minced
     2 Tablespoons grated fresh ginger
     1 1/2 teaspoons ground coriander
     3/4 teaspoon red pepper flakes
     1/2 teaspoon ground cumin
     1/2 teaspoon salt

Beef
     2 Tablespoons vegetable oil
     2 Tablespoons packed dark brown sugar
     1 Tablespoon fish sauce
     1 (1 1/2 to 1 3/4 lb) flank steak, halved lengthwise, then sliced on slight angle against grain into    1/4 inch slices.

1. For the Basting Sauce: Whisk all ingredients together in bowl. Reserve 1/3 of sauce in separate bowl. (Use reserved sauce to apply to raw beef)

2. For the Beef: Whisk oil, sugar & fish sauce together in medium bowl. Toss beef with marinade and let stand at room temp for 30 minutes. Weave Beef onto 12-inch metal skewers, 2 pieces per skewer, leaving 1 1/2 inches at top and bottom of skewer exposed. You should have 10 to 12 skewers.

3. For Gas Grill (Let me know if you want Charcoal grill instructions!)
    Turn all burners to high, cover, and heat grill until very hot, about 15 minutes. Leave all burners on high.
4. Clean and oil cooking grate. Place beef skewers on grill perpendicular to grate. Brush meat with 1/3 basting sauce (reserved portion) and cook covered until browned, about 3 minutes. Flip skewers, brush half of remaining basting sauce, and cook until browned on second side, about 3 minutes. Brush meat with remaining basting sauce and cook 1 minute longer. Transfer to large platter and serve with peanut sauce.

Peanut Sauce
    1 Tablespoon vegetable oil
    1 Tablespoon Thai red curry paste
    1 Tablespoon packed dark brown sugar
    2 garlic cloves, minced
    1 Cup regular or light coconut milk
    1/3 Cup chunky peanut butter
    1/4 Cup roasted unsalted peanuts, chopped (I left these out and thought it was still awesome)
    1 Tablespoon lime juice
    1 Tablespoon fish sauce
    1 teaspoon soy sauce

1. Heat oil in small sauce pan over medium heat until shimmering. Add curry paste, sugar, and garlic; cook, stirring constantly until fragrant, about 1 minute.

2. Add coconut milk and bring to a simmer. Whisk in peanut butter until smooth. Remove from heat and stir in peanuts, lime juice, fish sauce, and soy sauce. Cool to room temperature.

~Cooks Illustrated #112

Tuesday, September 11, 2012

Fresh Tomato Sauce with Rosemary and Bacon

As summer begins to wind down I figured I should post this recipe. This sauce is wonderful to make from fresh garden grown tomatoes. I have made it from store bought tomatoes as well, but fresh seem to have a much better flavor.

Cooking Tip #2:
Peeling Tomatoes: 1. Cut a very shallow "x" on the bottom of your tomatoes. 2. Prepare a pot of boiling water and an ice bath. 3. Drop tomatoes in boiling water for no more than 30 seconds. 4. Remove from water and place immediately in ice bath for at least 5 minutes. 5. Peel off the skin with your hands! http://allrecipes.com/howto/peeling-tomatoes/

Fresh Tomato Sauce with Rosemary and Bacon
(Use with 1 lb of a tubular pasta)
  • 6 ounces bacon (6 slices), cut crosswise into 1/2 inch strips
  • 2 medium garlic cloves, minced
  • 1 Tablespoon minced fresh rosemary
  • 1/4 teaspoon hot pepper flakes
  • 3 pounds ripe round tomatoes cored, peeled, seeded, and cut into 1/2 inch pieces
  • 1/2 teaspoon salt
  • 1/8 teaspoon black pepper
  • Granulated sugar
  • Parmesan cheese, for serving 
  1. Cook bacon in 10 inch skillet over medium heat, stirring occasionally, until crisp. Using slotted spoon, transfer bacon to paper towel lined bowl.
  2. Return skillet to medium-high heat. Add Garlic, rosemary and pepper flakes.
  3. Cook stirring constantly until garlic is fragrant, but not browned, about 30 seconds.
  4. Stir in tomatoes and cook until tomato pieces lose their shape to form chunky sauce, about 10 minutes.
  5. Stir in salt, pepper and sugar to taste. Add bacon, Toss sauce with Pasta and serve.
~Cooks Illustrated #82

Tuesday, August 28, 2012

Red Beans and Rice

Beans are one of my least favorite foods. However, Matt loves them, so when I feel like he needs a special dinner I make him Red Beans and Rice. I have never tasted any red beans and rice but my own, so I really don't know if this is a good recipe, but Matt eats it all up so it can't be horrible :-D This recipe is not too difficult, it does take some time (about 1.5 hours of cook time) but most of that is just giving the beans time to cook. I usually brine my beans overnight, so you do need a little planning for this. I think I'm going to try and start adding some cooking tips into my blog. So, here it is:

Cooking Tip #1:
If you are pressed for time you can "quick brine" your beans. Combine the salt, water and beans in a large dutch oven and bring to a boil over high heat. Remove the pot from the heat, cover and let stand 1 hour. Drain and rinse the beans and proceed with your recipe!

And here is the recipe:

Red Beans and Rice

For the Beans
Salt
1 pound small red beans (about 2 cups), rinsed
4 slices of bacon, chopped fine
1 medium onion, chopped fine (about 1 cup)
1 small green bell pepper, seeded and chopped fine (about 1/2 cup)
1 celery rib, chopped fine (about 1/2 cup)
3 medium garlic cloves, minced
1 teaspoon fresh thyme leaves (or 1/2 teaspoon dried)
1 teaspoon sweet paprika
2 bay leaves
1/4 teaspoon cayenne pepper
Ground black pepper
3 cups chicken broth
6 cups water (3 Pints)
8 ounces andouille sausage, halved lengthwise and cut into 1/4 inch slices (this kind of sausage is spicy)
1 teaspoon red wine vinegar, plus extra for seasoning
3 scallions, white and green parts, sliced thin
Hot sauce, for serving

For the Rice
2 cups long-grain white rice
1 tablespoon unsalted butter or vegetable oil
3 cups water
1 teaspoon table salt

Beans

  1. Dissolve 3 tablespoons salt in 4 qts cold water in large bowl or container. Add beans and soak at room temperature for at least 8 hours and up to 24 hours. Drain and rinse well.
  2. Heat bacon in large Dutch oven over medium heat, stirring occasionally, until browned and almost fully rendered, 5 to 8 minutes.
  3. Add onion, green pepper, and celery; cook stirring frequently, until vegetables are softened, 6 to 7 minutes.
  4. Stir in garlic, thyme, paprika, bay leaves, cayenne pepper, and 1/4 teaspoon black pepper; cook until fragrant, about 30 seconds.
  5. Stir in beans, broth, and water; bring to boil over high heat. Reduce heat and vigorously simmer, stirring occasionally, until beans are just soft and liquid begins to thicken 45 to 60 minutes.
  6. Stir in sausage and 1 teaspoon red wine vinegar and cook until liquid is thick and beans are fully tender and creamy, about 30 minutes.
  7. Season to taste with salt, black pepper, and additional red wine vinegar.
  8. Serve over rice, sprinkling with scallions and passing hot sauce separately.

Rice (I usually start this during step 6 of the beans)

  1. Place rice in colander or fine-mesh strainer and rinse under cold running water until water runs clear.
  2. Heat butter or oil in large saucepan over medium heat. Add rice and cook, stirring constantly until grains become chalky and opaque, 1 to 3 minutes.
  3. Add water and salt, increase heat to high and bring to boil, swirling the pot to blend ingredients.
  4. Reduce heat to low, cover and simmer until all liquid is absorbed, 18 to 20 minutes.
  5. Off heat, remove lid and place kitchen towel folded in half over saucepan; replace lid. Let stand 10 to 15 minutes; fluff with fork and serve.

~Cooks Illustrated #102


Saturday, July 28, 2012

Individual Baked Oatmeal

Once upon a time, when I had one child, I actually made fun breakfasts... We'd rotate between bagels, scrambled eggs, hard boiled eggs, oatmeal, and grits (and sometimes, I'd even make biscuits from scratch!). Now, with 3 children (4 and under...) mornings seem like a crazy grumpy time. The baby wants to be fed, the 4 year old is saying she's starving, and the 2 year old is busy picking out a warm winter outfit that he insists on wearing (on a 100 degree day no less). So when I found a recipe for individual baked oatmeal I thought it was such an awesome idea. Now we have something to break the monotony of the bowls of cereal! I had to buy a large thing of heavy cream for a pasta recipe (they were all out of the small things), so we've been eating our baked oatmeal with warm cream and my homemade peach spice honey. I haven't tried it yet, but the recipe claims you can freeze them and reheat as needed, which makes the idea even more awesome for us busy moms!

Individual Baked Oatmeal

2 large eggs
1 T vanilla
1 C unsweetened applesauce
1 C maple syrup
1 ripe banana, mashed
1 C blueberries
5 C old fashioned quick oats
1 teas. salt
3 teas. baking powder
1/4 C ground flax seed
1 T cinnamon
2 1/2 C skim milk

1. Preheat oven to 350. Line 24 muffin cups with liners and spray with non-stick cooking spray.
2. In a large bowl, mix eggs, vanilla, applesauce and maple syrup together. Add the banana and blueberries.
3. In a separate bowl, mix together oats, salt, baking powder, flax seed and cinnamon. Add milk to dry mixture.
4. Combine oatmeal mixture with egg mixture. Fill muffin cups.
5. Bake 35 to 40 minutes or until set. Best eaten warm with milk served on top.

~Hyvee Seasons, Volume 6, Issue 4

Monday, June 25, 2012

Memories...


Food and memories seem to go together. Whenever I have a jalapeno popper I always think of the end of my pregnancy with Evie :) Whenever I dip my french fries in mayonnaise I think of my travelling in the Netherlands. Whenever I make a silver white cake with chocolate chips I think of my last year in college and how our apartment's heater didn't work. It was so cold that fluffy light cake seemed like a pound cake (I miss you Anna and Laura and Amanda!). I could go on and on... Whenever I make Honey Hoisen pork tenderloin I remember how Ashley made it for us one of the times we came over to their apartment in 2006. And how that stupid pork just wouldn't cook! Until we realized the oven wasn't turned on :-D Ashley and Eric were some of our first friends when we moved to Muscatine. We have had a ton of fun times with them: beer pong, played with a tiny bouncy ball in their tiny apartment, late nights of playing settlers, Ashley super gluing her finger to her toe, singing karaoke... Just recently they moved from Muscatine and we already miss them! So, I will make this recipe and remember them (I'll just try to be sure to turn the oven on!)

Honey Hoisen Pork Tenderloin

2 Tablespoons sliced green onions
2 Tablespoons hoisin sauce
2 Tablespoons soy sauce
2 Tablespoons sage (or clover) honey
1 Tablespoon hot water
2 garlic cloves, minced
1 lb Pork Tenderloin, trimmed
1/4 teaspoon salt
1/2 teaspoon sesame seeds       

1. Combine first 6 ingredients in a small bowl. Pour 1/4 cup of mixture into ziplock bag with pork. Reserve rest of marinade. Refrigerate pork 30 minutes.
2. Preheat oven to 400 degrees.
3. Remove Pork from bag. sprinkle with salt. Heat a skillet over medium heat. Coat pan with cooking spray. Add pork, brown on all sides.
4. Brush with 1 Tablespoon of marinade. Sprinkle with sesame seeds. Place Pork on cookie sheet and bake for 20 minutes.
5. Drizzle pork with remaining marinade and serve sliced.                              

Wednesday, June 13, 2012

Sichuan Pork & Menu Planning Apps

I recently discovered the awesomeness of a menu planning app. This app lets me input recipes on my computer and then will sinc the recipes with the app on my phone. Then I can set my menu plan up and then it will add the ingredients I need to my grocery list. The name of this oh so awesome app is Pepperplate. I even had Matt download it so he can see our weeks menu if he is wondering what's for dinner, or if he needs to add something to my grocery list. I feel as though I have entered the technological age! No more grocery lists on pieces of paper that get lost in my purse or left at home! Now I just have to worry about dropping my phone... I'm also currently in the process of typing up all my recipes (which should make it easier to blog about them!).

Last week I realized I hadn't tried out any new recipe's in awhile (my excuse: 3 children :-)). I decided to attempt Sichuan Stir-Fried Pork in a garlic sauce from my cooks illustrated magazines (I LOVE this magazine btw). It didn't take too long to throw together & turned out awesomely! I was a little worried about the pork (you soak it in baking soda???) but it turns out very tender and tastes great. So, if you're feeling adventurous here's a yummy pork dish:

Sichuan Stir-Fried Pork in a Garlic Sauce

Ingredients

Sauce
1/2 cup chicken broth
2 tablespoons sugar
2 tablespoons soy sauce
4 teaspoons Chinese black vinegar (2 teaspoons balsamic vinegar & 2 teaspoons rice vinegar)
1 tablespoon toasted sesame oil
1 tablespoon Chinese rice wine or dry sherry
2 teaspoons ketchup
2 teaspoons fish sauce                                   
2 teaspoons corn starch 

Pork       
12 oz boneless country-style pork ribs, trimmed
1 teaspoon baking soda                                   
1/2 cup cold water
2 teaspoons Chinese rice wine or dry sherry
2 teaspoons cornstarch                           
Stir-Fry
4 garlic cloves, minced
2 scallions, white parts minced, green parts sliced thin
2 tablespoons Asian broad-bean chili paste (or Sriracha sauce, cut back on this a lot if you don't want spicy)
4 tablespoons vegetable oil
6 oz shitake mushrooms, stemmed and sliced thin
2 celery ribs, cut on bias into 1/4 inch slices

 Instructions

  • For the Sauce

    1. Whisk all ingredients together in a bowl; set aside.
  • For the Pork

    1. Cut pork into 2 inch lengths, then cut each length into 1/4 inch matchsticks.
    2. Combine pork with baking soda and water in bowl.
    3. Let sit at room temperature for 15 minutes.
    4. Rinse pork in cold water. Drain well and pat dry with paper towels. Whisk rice wine and cornstarch in bowl. Add pork and toss to coat.
  • For the Stir-Fry

    1. Combine garlic, scallion whites & chili paste in bowl.
    2. Heat 1 tablespoon oil in Wok over high heat until just smoking. Add mushrooms and cook, stirring frequently, until tender, 2 to 4 minutes. Add celery and continue to cook until celery is crisp-tender, 2 to 4 minutes. Transfer vegetables to separate bowl.
    3. Add remaining 3 tablespoons oil to now-empty wok and place over medium-low heat. Add garlic-scallion mixture ad cook, until fragrant, about 30 seconds.
    4. Transfer 1 tablespoon garlic-scallion oil to small bowl and set aside.
    5. Add pork to wok and cook, stirring frequently, until no pink remains, 3 to 5 minutes.
    6. Whisk sauce mixture to recombine and add to wok. Increase heat to high and cook, stirring constantly, until sauce is thickened and pork is cooked through, 1 to 2 minutes.
    7. Return vegetables to wok and toss to combine. Transfer to serving platter, sprinkle with scallion greens and reserved garlic-scallion oil, and serve over steamed white rice.

Tuesday, May 29, 2012

Summer Travels and Pico

With the passing of Memorial Day my summer has officially begun. Every year we begin our summer with memorial day travels (never invite us to a cook out, we won't be in town!). We are either in Florida with my family or in Harper's Ferry with Matt's family. And since I like to travel during the summer I find it to be an excellent way to start things off :)

This year we were in Harper's Ferry. Our first mini vacation with 3 kids! Evie & Laurence enjoyed boating, swimming in the pool & getting more candy than any child should have at the memorial day parade (why is it that every parade in Iowa has to have at least 50 tractors in it???). Aria enjoyed dozing by the pool :) Mommy enjoyed boating, reading, tanning (okay, burning), and a slightly crazy girls night with her sister in law. What a wonderful way to begin the summer!

My lovely sister in law, Jenni, made us some wonderful Pico De Gallo to snack on over the weekend and I decided I needed to figure out a recipe for it! I like it better than normal salsa because I feel so healthy eating it :) So, here is the recipe I threw together today, one of the things I love about this is that you can change it up as much as you want!

Pico De Gallo
                                   
  • 1/2 Red Onion, chopped
  • 1/2 Green Pepper, chopped
  • 1/2 Can Corn
  • 1/2 jalapeno, deseeded & minced                                   
  • 2 Cloves Garlic, minced
  • Cilantro, minced
  • 1/2 teaspoon Salt
  • 1 lime, juiced 
  • 4 Roma Tomatoes, cored, deseeded & chopped                                  

  • Combine everything and enjoy!

    Sunday, May 20, 2012

    Orzo? For Sale? Or So? Or is though?

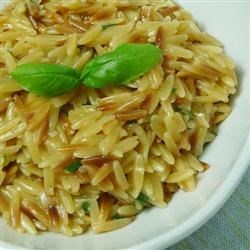
    Well, I just had a baby. Okay, not just, about 7 weeks ago :) Things have been crazy! So crazy in fact that Laurence managed to dump a water bottle full of water on my phone. So now I have a new phone. It's pretty and purple and has some kind of cool name (something like Electric, Fire, or Rhyme) It also has this totally awesome feature: I can now dictate text messages, emails, facebook statuses, etc! This has provided me with loads of entertainment. I recently attempted to send the following text: "No gyro stand..." (I had been told that there was a man selling gyros at our local farmers market) It ended up looking like: "No year o stands. period." It also doesn't seem to recognize the word Orzo, it thought I was saying everything from "For Sale" to "Or so"... This made my weekly menu planning on my spiffy new phone on my spiffy new menu planning app amusing :) So, here is a recipe for "Or is though". Evie and Laurence love this recipe :)

    Orzo with Parmesan and Basil

    • 2 tablespoons butter
    • 1 cup uncooked orzo pasta
    • 1 (14.5 ounce) can chicken broth
    • 1/2 cup grated Parmesan cheese
    • 1/4 cup chopped fresh basil
    • salt and pepper to taste
    • 2 tablespoons chopped fresh basil

    1. Melt butter in heavy skillet over medium-high heat. Stir in orzo and saute until lightly browned.
    2. Stir in chicken stock and bring to boil. Cover. Reduce heat and simmer until orzo is tender and liquid is absorbed, about 15 - 20 minutes.
    3. Mix in Parmesan cheese and basil. Season with salt and pepper. Transfer to shallow bowl. Garnish with basil sprigs.                 
    http://allrecipes.com/recipe/orzo-with-parmesan-and-basil/detail.aspx?event8=1&prop24=SR_Title&e11=orzo%20and%20basil&e8=Quick%20Search&event10=1&e7=Home%20Page

    Saturday, November 5, 2011

    Pumpkin Soup

    When I think of fall I think of leaves, pumpkins, colder weather & holidays. It's easy for me to start looking forward to holidays & family when leaves start to change color. October = Halloween. A holiday that has started to become much more fun as our kids get older. Then comes November with Thanksgiving. After that it's a short road to December & Christmas. But I won't talk about Christmas yet since we haven't gotten through Thanksgiving (one of Matt's rules :-)). I love Thanksgiving with my family. We cook our turkey (which is of course named Tom, or Bertha, or etc) on a rotisserie. Whenever you walk by the Turkey you're supposed to brush on a combination of melted butter & herbs. We also always have a 4 course meal. Appetizer, Soup, Main Dish & Dessert (if you have room!). For years our soup of choice has been Pumpkin. I love this pumpkin soup! I recently made 3 huge batches of it for a bazaar at church and had it devoured. Now I will share the recipe with you, feel free to add it to your yearly fall memories!

    Pumpkin Soup

    3 Tablespoons Olive Oil
    8 slices of bacon, chopped
    1 onion, chopped
    2 stalks celery, chopped
    2 carrots, chopped
    8 Cups of Chicken broth
    4 Cups of Pumpkin (I usually use fresh, but canned works as well)
    2 Tablespoons fresh Thyme
    Salt & pepper
    Nutmeg
    1 Cup Half & half

    1. In large soup pot saute Bacon, Onion, Celery, & Carrots in Olive Oil until soft.
    2. Add Broth, Pumpkin & Thyme. Bring to a boil. Reduce heat to simmer. Simmer at least 20 minutes.
    3. Puree soup in batches in blender. Return to pot, add pinch of Nutmeg and Half & half. Serve.

    Garnish with small sprig of thyme & nutmeg. You can also serve with Parmesan or cheddar cheese.

    ~Bon Appetite magazine.
    (I also forgot to take a picture of all that soup I made, so this is not my own picture)

    Monday, August 29, 2011

    Easy Teriyaki!

    I'm so behind on recipes. I'm making some great ones this week: Honey Hoisen Pork Tenderloin, Chicken Pot Pie, Fried Steak Tacos (Matt's birthday meal for the last 3 years).... Hopefully I'll be able to get around to posting these yummy meals for you. This week actually feels really bizarre, it's almost as if it's an extra free week thrown into the calendar. I'm sure everyone has those groups that meet the 3rd Monday of every month, the 2nd Tuesday of every month, & the 2nd & 4th Wednesday of every month (to give a few examples from my life...) But NO group meets during the 5th week of the month! Not that I won't be busy with a variety of things, but it's nice to look at my evening schedule and realize I don't have to rush out the door anywhere & we'll be able to spend every night as a 4 person family. So, enjoy your "free" week :) I hope you all have to opportunity to sit down to dinner as a family this week & feel free to make this really quick & easy Steak Teriyaki recipe!

    Gyuniku Teriyaki (Broiled sliced beef with sweet soy-seasoned glaze)

    1.5 lbs lean boneless beef (usually buy a sirloin) cut in 12 slices 1/4 inch thick

    Sauce:
    1 C mirin (sweet sake) or 1 cup Pale dry Sherry (usually what I end up using)
    1 C Soy Sauce
    1 C Chicken broth

    Glaze: (I usually double or triple this, Americans prefer saucier meat than the Japanese)
    1/4  C of the Sauce
    1 T sugar
    2 teas. cornstarch mixed with 1 T cold water

    Garnish:
    4 teas. powdered mustard mixed with just enough hot water to make a thick paste and set aside for 15 minutes. (note: this is spicy! I love to dip my meat in it, but matt prefers the meat without)

    Sauce:
    Warm sherry in 2 qt sauce pan over medium heat. Off heat ignite sherry with lighter & shake pan back & forth until flame dies out. Stir in Soy Sauce and Chicken stock. Bring to a boil. Pour into a bowl & cool to room temp.
    Glaze:
    Combine 1/4 C of the sauce & 1 T sugar in saucepan. Bring almost to a boil over medium heat. reduce the heat to low. Stir in combined cornstarch and water into sauce. Cook, stirring constantly until it thickens to a clear syrupy glaze. Pour into a dish and set aside
    Meat:
    Preheat broiler to highest point. Dip beef, one slice at a time into Sauce (not the glaze!). Broil 2 inches from the heat for 1 minute on each side, or until lightly brown. For well done meat broil an additional minute.
    To Serve:
    Slice the meat into 1 inch wide strips & place them on individual serving plates. Spoon a little of the glaze over each serving. (What I really love about Asian cooking is preparing each individual plate before taking it to the table. I know it's silly, but it's nice to take the time to make the plate look pretty with everything before everyone sees it!)

    ~The Cooking of Japan

    Wednesday, July 27, 2011

    Spicy Chicken!

    It seems I'm down to posting once a month... I was hoping to make this a once a week thing. Ah well :) I love Chicken Tikka. It's one of my favorite dishes and I could actually live off it's leftover (I usually get bored with leftovers). Sometimes I will act the martyr & let Matt finish off the Chicken Tikka, but then I'm continually stealing bites off his plate. I'm making myself hungry just typing this...

    When Evie was little she used to think she needed to try everything I was cooking with. Once when I was cutting up garlic for this dish she asked for a piece and with some reluctance ("you really aren't going to like this Evie...") I let her have a piece. You should have seen her face! I don't think she's tried anything off my cutting board since then.

    Chicken Tikka Masala


    This recipie takes more time than the former. I find cutting the veggies at lunch or even the night before really helps save time when throwing this together. The recipie does say you can make the sauce up to 4 days ahead and gently reheat before adding the chicken. Also, they say to use whole milk yogurt, I've never been able to find this at our grocery so just use whatever plain yogurt you can find. (Also, the picture does not do this dish justice! It is so yummy!)

    Chicken Tikka
    1/2 teaspoon ground cumin
    1/2 teaspoon ground coriander
    1/4 teaspoon cayenne
    1 teaspoon table salt
    2 pounds boneless, skinless chicken breasts, trimmed of fat (I'll use 3-4 frozen breasts usually)
    1 cup plain whole milk yogurt
    2 tablespoons vegetable oil
    2 medium garlic cloves, minced
    1 tablespoon grated fresh ginger

    Masala Sauce
    3 tablespoons vegetable oil
    1 medium onion, diced fine (about 1 1/4 cups)
    2 medium garlic cloves, minced
    2 teaspoons grated fresh ginger
    1 serrano chilie, ribs and seeds removed, flesh minced (if you want it spicier leave in the ribs and seeds)
    1 tablespoon tomato paste
    1 tablespoon garam masala (substitute with 2 teas. ground coriander, 1/4 teas. ground cardamom, 1/4 teas. ground cinnamon, and 1/2 teas. ground black pepper)
    1 (28 oz) can crushed tomatoes
    2 teaspoons sugar
    1/2 teaspoon table salt
    2/3 cup heavy cream
    1/4 cup chopped fresh cilantro leaves

    1. For the Chicken: Combine cumin, coriander, cayenne, and salt in small bowl. Sprinkle both sides of chicken with spice mixture, pressing gently so mixture adhears. Place chicken on plate, cover with plastic wrap and refridgerate for 30 to 60 minutes. In large bowl, whisk together yogurt, oil, garlic and ginger; set aside.
    2. For the Sauce: Heat oil in large Dutch oven over medium heat until shimmering. Add onion and cook, stirring frequently, until light golden, 8 to 10 minutes. Add garlic, ginger, chile, tomato paste, and garam masala; cook stirring frequently until fragrant, about 3 minutes. Add crushed tomatoes, sugar, and salt; bring to a boil. Reduce heat to medium low, cover and simmer for 15 minutes, stirring occasionally. Stir in cream and return to simmer. Remove pan from heat and cover to keep warm.
    3. While sauce simmers, adjust oven rack to upper-middle position (about 6 inches from heating element) and heat broiler. Using tongs, dip chicken into yogurt mixture (chicken should be coated with thick layer of yogurt) and arrange on wire rack set in foil lined rimmed baking sheet or broiler pan. Discard excess yogurt mixture. Broil chicken until thickest parts register 160 degrees on instant read thermometer and exterior is lightly charred in spots, 10 to 18 minutes, flipping chicken halfway through cooking.
    4. Let chicken rest 5 minutes, then cut into 1 inch chunks and stir into warm sauce (do not simmer chicken in sauce). Stir in cilantro, adjust seasoning with salt, and serve with basmati rice (I often use jasmine or any rice on hand...)

    Let me know if anything is confusing and doesn't make sense. Also, let me know if you need me to explain any cooking terms.
    ~Cooks Illustrated #88

    Saturday, June 25, 2011

    Key Lime Pie Anyone?

    It must be a dessert sort of week :) So, I was hosting an event at our house last night & had to serve dessert. I decided to make a dessert I love: Key Lime Pie Bars. Now this recipe is best if made close to when you plan on serving them. I waited until Friday morning to make them (I also waited till Friday to, scrub my floors, deep clean my kitchen, deep clean my bathroom, okay, just deep clean my whole house). So, Friday morning at 6 AM I'm baking Key Lime Pie bars when I realize I forgot an ingredient. Not just any ingredient, but the main ingredient (can you guess which one?). I packed the kids off to HyVee, Laurence had just finished a bottle & Evie was still in Superman Jammies, all so I could by LIMES! Sigh. Well, the bars got made, they were awesome, the house got cleaned, it looked awesome for 2 seconds. Now I will give you the recipe, just don't forget the LIMES!

    Key Lime Pie Bars
    Crust

    5 oz animal crackers
    3 T packed light or dark brown sugar
    Pinch table salt
    4 T unsalted butter, melted & slightly cooled
    Filling
    2 oz cream cheese, room temp (I accidently bought some bizzare named cream cheese starting with an N, but it tasted the same)
    1 T grated lime zest, minced
    pinch table salt
    1 can (14 oz) sweetened condensed milk
    1 large egg yolk
    1/2 C Key lime or regular lime juice
    Garnish (optional)
    3/4 C shredded sweetened coconut, toasted until golden crisp (I never do this as I don't like coconut)

    Note: If you cannot find fresh key limes (or if you don't want to spend forever juicing them...) use regular limes. DO NOT use bottled lime juice. Grate the zest from the limes before juicing them, avoiding the bitter white pith that lies just beneth the outermost skin.

    1. Adjust oven rack to middle position and heat oven to 325. Cut about 12-inch length extra wide, heavy duty foil. Line 8-inch square baking pan, allowing excess foil to overhang pan sides. Spray foil with nonstick cooking spray.

    2. To Make the Crust: In workbowl of food processor, pulse animal crackers until broken down, about ten 1-second pulses; process crumbs until evenly fine, about 10 seconds. Add brown sugar and salt; process to combine, 10 to 12 1-second pulses. Drizzle butter over crumbs and pulse until crumbs are evenly moistened with butter, about ten 1-second pulses. Press crumbs evenly and firmly into bottom of prepared pan. Bake until deep golden brown, 18-20 minutes. Cool on wire rack while making filling. Do not turn off oven.

    3. To Make the Filling: While crust cools, in medium bowl, stir cream cheese, zest, and salt with rubber spatula until softened, creamy and thouroughly combined. Add sweetened condensed milk and whisk vigorously until incorporated and no lumps of cream cheese remain; whisk in egg yolk. Add lime juice and whisk gently until incorporated (mixture will thicken slightly).

    4. To Assemble and Bake: Pour filling into crust; spread to corners and smooth surface with rubber spatula. Bake until set and edges begin to pull away slightly from sides, 15 - 20 minutes. Cool on wire rack to room temp, 1 to 1.5 hours. Cover with foil and refrigerate until thoroughly chilled, at least 2 hours.

    5. Loosen edges with paring knife & lift bars from baking pan using foil extensions; cut bars into 16 squares. Sprinkle with toasted coconut, if using, and serve. Leftovers can be refrigerated up to 2 days; crust will begin to soften. Let bars stand at room temp about 15 minutes before serving.

    ~ Cooks Illustrated 81

    Monday, June 20, 2011

    Tea Cakes

    On Father's Day I always think of Tea Cakes. My dad loves this cookie & when I go and visit I try to bring some. Unfortunatley I found with the craziness of just getting back from Florida & trying to pack up for Kansas plus make it to all of that week's activities (not to mention being a mom of 2) I did not manage to make my dad any. So many excuses for not managing to make something special for the man that did so much for my family. I'm going to use this as a reminder that I need to think less of myself & more of others. I suppose the obvious bible verse comes to mind: "So in everything, do to others what you would have them do to you" ~ Matthew 7:12. So, take some time to make cookies for someone you love :) and I will be sure to make my dad tea cakes the next time I go to Kansas!

    Tea Cakes
    1 1/2 Cups Sugar
    4 Tbsp. Butter
    3 Eggs
    1/2 Cup Milk
    1 Tbsp. Vanilla
    6 Cups Flour
    3 tsp. baking powder
    1/2 tsp. baking soda
    dash salt

    - Cream butter and sugar. Add eggs, milk & vanilla, mix well.
    - Add flour, baking powder, baking soda & salt. It should feel like bisucit dough.
    - Roll thin & cut (I usually like them kind of thick). Bake at 375 for 10-12 minutes.

    (Traditionally these cookies are cut into circles, however, when I am making these with Evie I let her pick out some fun cookie cutters). Enjoy!

    Thursday, May 19, 2011

    Asparagus? Eww!

    I have a ton of different pictures of things I've cooked, but no time to post about them! May has been/is going to be crazy. I feel like all month I've been running around like a chicken with its head cut off. I can't imagine how much crazier it will be when I have kids in school! Every weekend is busy, most weeknights are crazy, I can't wait for my Florida vacation! (I don't know when I'm going to find time to pack...)

    I cooked dinner last night. It was crazy, I don't have much else to say about it... (honestly I've deleted 5 different paragraphs of writing this morning). I made Steak teriyaki, which I love! Rice (I usually prefer noodles, but rice was easier, so rice was made), and Asparagus, which I hate. Or at least I thought I hated. So why did I buy it & cook it? Kind of on a whim I suppose. I usually buy some napa, some water chestnuts, some sugar snap peas & throw them in some noodles with a yummy sauce. But I know Matt likes asparagus so I randomly decided to give it another try. Well, I googled "asian asparagus recipe", clicked on the first link, made that recipe & loved it! So, while I would love to give you my teriyaki recipe (it is super easy!) I think the asparagus recipe deserves to be posted. Perhaps next time you will get the teriyaki, for now, enjoy some Asparagus!

    Asparagus Grilled with an Asian Touch

    Ingredients:
    3 lbs asparagus, tough ends removed
    1 tablespoon brown sugar or 1 tablespoon honey
    1/8-1/3 cup sesame oil
    1/3 cup soy sauce
    1/3 cup rice wine vinegar (I just used rice vinegar)
    3 garlic cloves, crushed and minced finely
    1/4 inch fresh ginger, grated
    black pepper
    chili pepper flakes

    Directions:
    1. Put all marinade ingredients into a zip-lock bag shake and add asparagus and marinate for 1 hour to overnight.
    2. Remove from marinade, cook on a hot grill about 5 minutes just till lightly browned.
    3. Turning often.
    4. Optional: Heat the marinade and pour over the grilled asparagus.

    (I halved the recipe (I mean, really, who needs 3 lbs of asparagus), only marinated for about an hour, and didn't do step 4, and I'm not really sure Matt did step 3 either... I would also like to add that while I was putting the marinade together I knocked the bag off the counter & ended up with most of the marinade on my dishwasher & kitchen floor, so I'm not sure my end proportions were quite right. It still tasted good :-))

    ~ http://www.food.com/recipe/asparagus-grilled-with-an-asian-touch-90746#ixzz1MoG6zxfK

    (This is part of the reason dinner was so crazy to get together :P)

    Saturday, May 7, 2011

    Angel Hair (as in pasta...)

    I never realized how that first hair cut would change the way my child looked! I waited and waited and waited to have Evie's haircut. She's a girl, her hair can be long, why worry about the stress of  a screaming child getting their hair cut? (I've heard a few horror stories!) Finally about a month before Evie turned 3, Mommy & Evie went in for a mother daughter haircut. The stylist cut my hair while Evie watched very attentively and then it was her turn. She sat so well & was so excited (she wanted to go back the next day for another haircut). They only cut off about an inch and a half of her hair, but how different she looks! I'm so glad we conquered the first haircut, but I miss her old hair. Yes, it's all nice & uniformly cut, but it's just not the same.

    This brings us to Laurence. He needs a haircut! He isn't even 9 months old & he needs a haircut. He was born with quite a bit of hair, most of which fell out. The hair near his forehead however didn't and it is long & wispy and I think it keeps on growing. It gets in his eyes, it gets tangled, it is just a hassle! But how I dread cutting it. I know I will miss it and I don't want my baby boy to grow up yet! I think I'll let him keep his angel hair awhile longer :)

    Yes, yes, I'm getting to the pasta part! It has been a pasta sort of week! I love this pasta almost more than the penne. It is light & pretty easy to make. The only difficulties I've had are that the garlic tends to burn (I think roasting it separately would fix this problem) and making sure all the elements are done at the same time can be difficult. (It also works well as a side dish to grilled chicken or pork)

    Angel Hair with Roasted Butternut Squash

    1 2 lb Butternut Squash, peeled & cut in small pieces
    1 bulb garlic, peeled
    3 T olive oil
    1 lb Angel Hair
    1/4 C butter
    3 slices bacon, chopped & cooked
    1/2 C walnuts, chopped & toasted
    1/4 tsp ground nutmeg
    1/3 C Parmesan Cheese (I serve this separately)

    1. In baking pan, toss squash, garlic, olive oil, 1/4 tsp salt & 1/4 tsp pepper. Spread squash in single layer. Bake 15 - 18 minutes or until squash is tender & lightly browned.
    2. Cook pasta with 1 T salt
    3. Heat butter over medium heat until it turns light brown, stir frequently
    4. Toss Spaghetti with half of butter. Toss squash, bacon, nuts, & nutmeg with remaining butter. Serve squash over pasta. Sprinkle with cheese.

    ~bhg.com
    (amusing, after typing this out I just realized I forgot to put the nutmeg in last night. Ah well, it still tasted great!!)

    Wednesday, May 4, 2011

    Penne Alla Vodka & Tantrums

    So with turning 3 I had high hopes that the tantrums were coming to an end. They just seem to be bigger, louder & more dramatic. (And they also wake up the baby, NOOOOO!)

    Last night Matt was home late from work (I know, I know, I'm lucky, when I say late I mean 5, but he does go in really early). I was attempting to get dinner made with a fussy 9 month old who didn't want to nap & a grumpy 3 year old who wanted to be entertained. I handed Laurence a whisk & a mixing bowl and let him bang around. Evie of course wanted to join the fun, but she wanted some pasta to pretend to cook. With some misgivings I gave her some uncooked macaroni noodles to play with & went back to the pasta I was really cooking. Well, the next time I turned around there was pasta all over the kitchen floor. Trying to keep my frustration in check I asked Evie to put it back in her bowl. "I don't want to" she tells me with defiance. The next 30 minutes consisted of me telling her she had to pick it up & her laying on the kitchen floor saying she wouldn't.

    Dinner was of course finished during this time, Matt got home & we sat down to eat, minus Evie (who was still laying on the kitchen floor). When she realized we were going to eat without her she got that pasta picked up in under a minute. Then she sat down & ate 2 huge helpings of this yummy pasta! (Of course another tantrum followed when I asked her to eat one piece of spinach... the conflict never seems to end). Anyway, enjoy the recipe, it's one of our favorites!

    Penne Alla Vodka

    1 28 oz can whole tomatoes, reserve liquid
    5 slices bacon, chopped
    1/2 small onion, (1/4 C) minced
    1 T tomato paste
    2 garlic cloves, minced
    1/4 teas red pepper flakes (leave out if you don't like a little spice)
    Table Salt
    1/3 C vodka
    1/2 C heavy cream
    1 pound penne
    2 T chopped fresh basil (or 2 teas dried)

    1. Puree half of tomatoes in food processor until smooth. Remove cores & dice remaining tomatoes into 1/2 inch pieces. Combine tomatoes in measuring cup, add reserved liquid to equal 2 cups.
    2. Heat pan over medium heat, saute bacon until crisp. Remove from pan, add onion & tomato paste, cook stirring occasionally until onions are light golden brown around edges, about 3 minutes. Add garlic & pepper flakes; cook stirring constantly until fragrant, about 30 seconds.
    3. Stir in tomatoes & 1/2 teas. salt. Add vodka. Simmer briskly at medium high heat, 8 to 10 minutes, until alcohol is cooked off. Stir in cream and cook 1 minute.
    4. Add sauce to cooked pasta in Dutch oven, toss over medium heat until pasta absorbs some sauce. Stir in basil & bacon. Serve with Parmesan cheese.

    ~Cooks Illustrated #83, with some variations. (let me know if you want the original recipe, the articles that go along with the recipes are very useful!)

    Thursday, April 28, 2011

    Soup...

    So soup. I hate soup. Well, not all soups (soups I like: french onion, cheesy potato, pumpkin). But really, most soups I just don't like (especially any with ground beef. Eww!). I never fill full after eating them. I'd really rather have a sandwich or a hunk of bread even. Anyway, Matt loves soups (not all soups, but quite a few (soups matt does NOT like: french onion, cheesy potato, pumpkin). I remember being told that marriage was about comprimise. I never realized this would include food. Okay, fine, don't squeeze the toothpaste the right way, I can deal with that. But soup? I'm supposed to eat soup with you? Well, I cook Matt soup and I even eat it with him. This must make me the most awesomest wife in the world :) Right?

    Well, we have a little after Easter tradition. Every year we go to Matt's grandparents for Easter. Every year they have ham. Every year we are given the ham bone. And every year I make Matt Ham & Bean soup. Tonight was the night for our yearly ham bone soup. Here is the recipe if you ever happen to be gifted a ham bone (I have heard that you can ask for one at a meat counter, but I've never been brave enough to try this). Enjoy! (If you like soup that is...)

    Ham & Bean Soup
    1 lb dry Navy beans
    4 C water
    4 C chicken broth
    1 ham hock
    1 C chopped carrots
    1 C chopped celery
    1 C chopped onion
    3 garlic cloves, minced
    1 tsp. mustard powder
    2 bay leaves
    1 tsp. Paprika

    1. Soak beans for at least 8 hours. Discard soak water.
    2. In large pot combine all ingredients. Stir & bring to a boil. Reduce heat & simmer for 2.5 to 3 hours.
    3. Remove Ham Hock & remove meat from bone.
    4. Remove 2 cups of soup & puree. Replace both soup & ham meat in pot. Stir well, serve.

    Tuesday, April 26, 2011

    Bourbon-Glazed Salmon

    Wow, two posts in one day! So, I think I am maybe going to mainly post about food (because I love it so!!) So, tonight I made a new recipie. Bourbon-Glazed Salmon. It was yummy & easy to make. I did feel that while some bites had enough of the glaze, the thicker portions could have used more. Perhaps the recipie could be tweaked & a glazed made to serve with the Salmon as opposed to just marinate it in. I served it with a bag of spinach (yes, I just put the bag on the table and said "tada!", hey, I'm busy! :-)), and orzo. Well, enjoy!


    Bourbon-Glazed Salmon

    Ingredients:
    1 cup packed brown sugar
    6 tablespoons bourbon
    1/4 cup low-sodium soy sauce
    2 tablespoons fresh lime juice
    2 teaspoons grated peeled fresh ginger
    1/2 teaspoon salt
    1/4 teaspoon freshly ground black pepp
    er
    2 cloves crushed garlic
    8 (6-ounces each) salmon fillets (about 1 inch thick)
    non-stick cooking spray
    4 teaspoons sesame seeds
    1/2 cup thinly sliced green onions

    Prep:
    Combine the first 8 ingredients in a large zip-top plastic bag; add salmon fillets. Seal bag, and marinate in refrigerator 30 minutes, turning bag once.

    Remove fillets from bag; discard marinade. Preheat broiler. Place fillets on broiler pan coated with cooking spray. Broil 11 minutes or until fish flakes easily when tested with a fork.

    Sprinkle each fillet with 1/2 teaspoon sesame seeds and 1 tablespoon onions (I must admit that I totally forgot about this part...)